Cloud Archive
To migrate the UMA Archive to the REDDOXX Cloud environment, the REDDOXX Cloud is naturally required first. It is available either with an M365 integration (this synchronizes users and email addresses from your M365 tenant) or as an OnPrem connection (here, users and email addresses are synchronized to the cloud from a directory service via an LDAP connector).
The migration of the UMA Archive to the REDDOXX Cloud can either take place directly via the UMA export to the Cloud Container, this has the advantage that no further intermediate steps are necessary and no additional local storage is required, or via the intermediate step of exporting to ZIP and then importing into the container using the Toolbox.
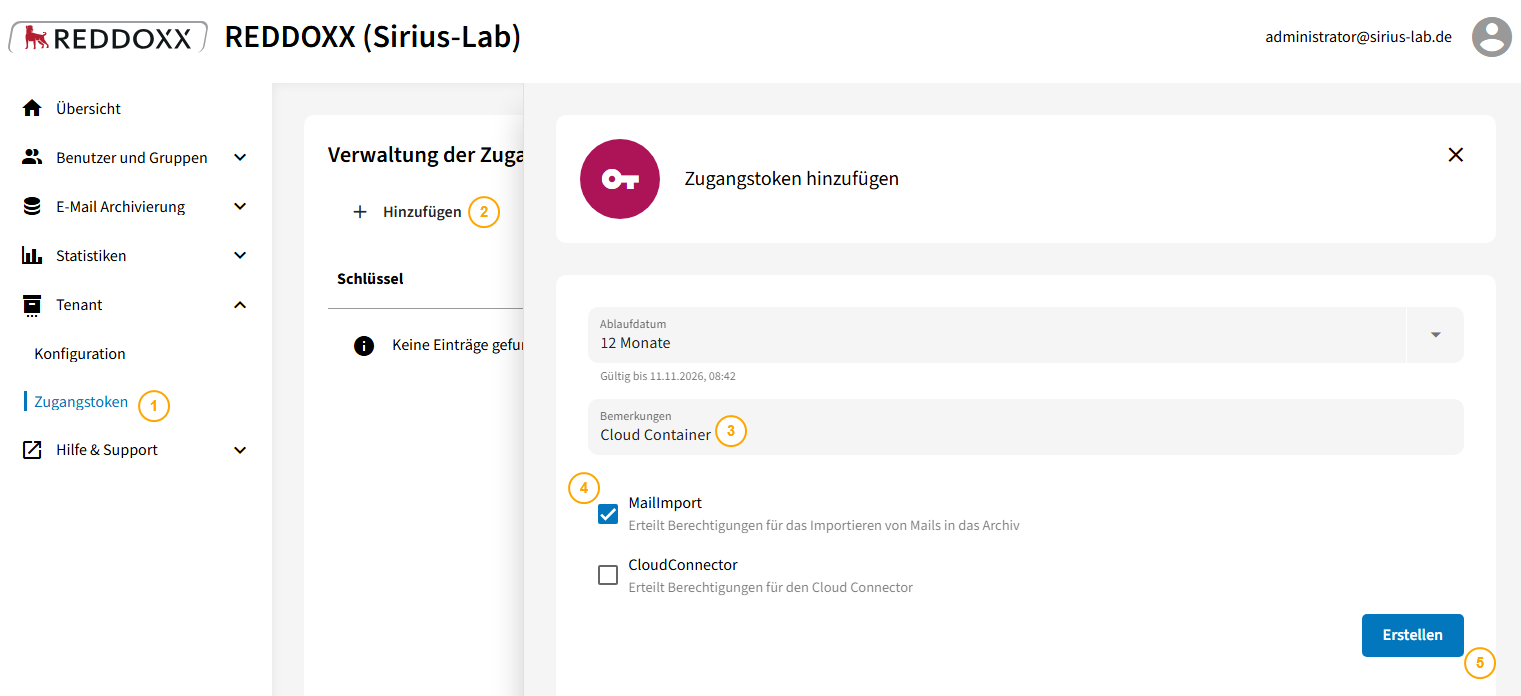
To enable access to the Cloud Container, an access token must be set up in the REDDOXX Cloud.
The following steps are necessary:
- Select Access Tokens in the REDDOXX Cloud
- Click on "Add"
- Assign an appropriate name (e.g., Cloud Container)
- Select the permission "Mail Import"
- Click on Create
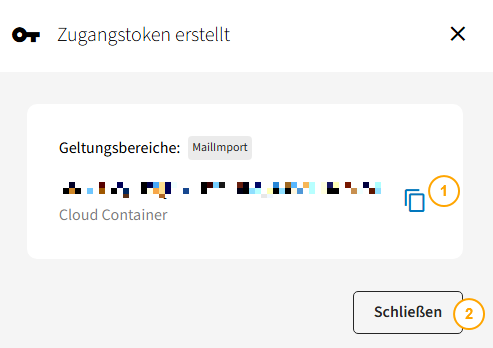
The access token will then appear once:
- Copy the token in the following window
- Confirm with "Close"
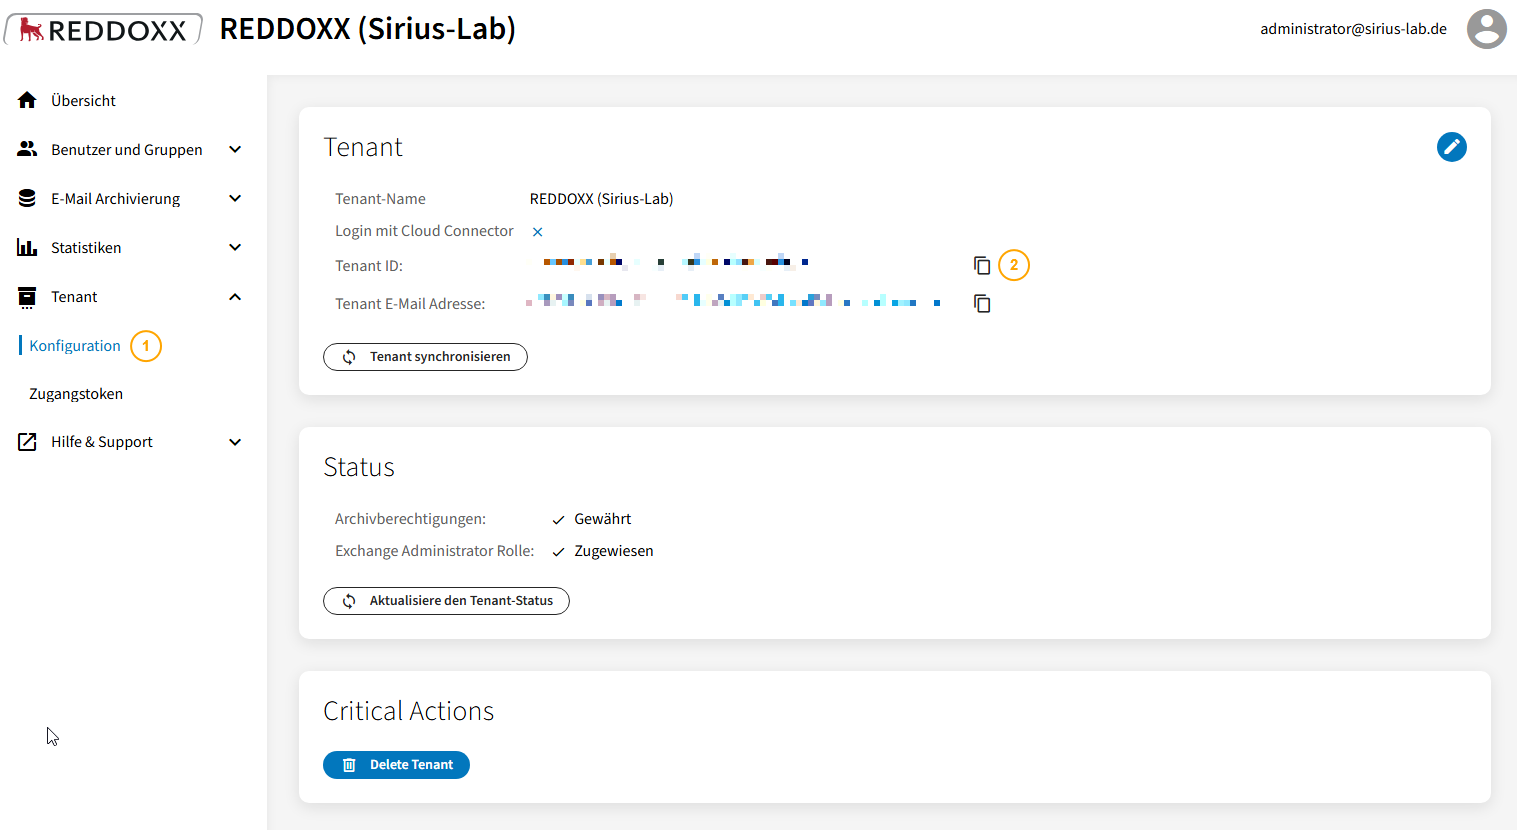
You will also need the Tenant ID:
- Click on Tenant and then Configuration in the REDDOXX Cloud
- Copy the Tenant ID
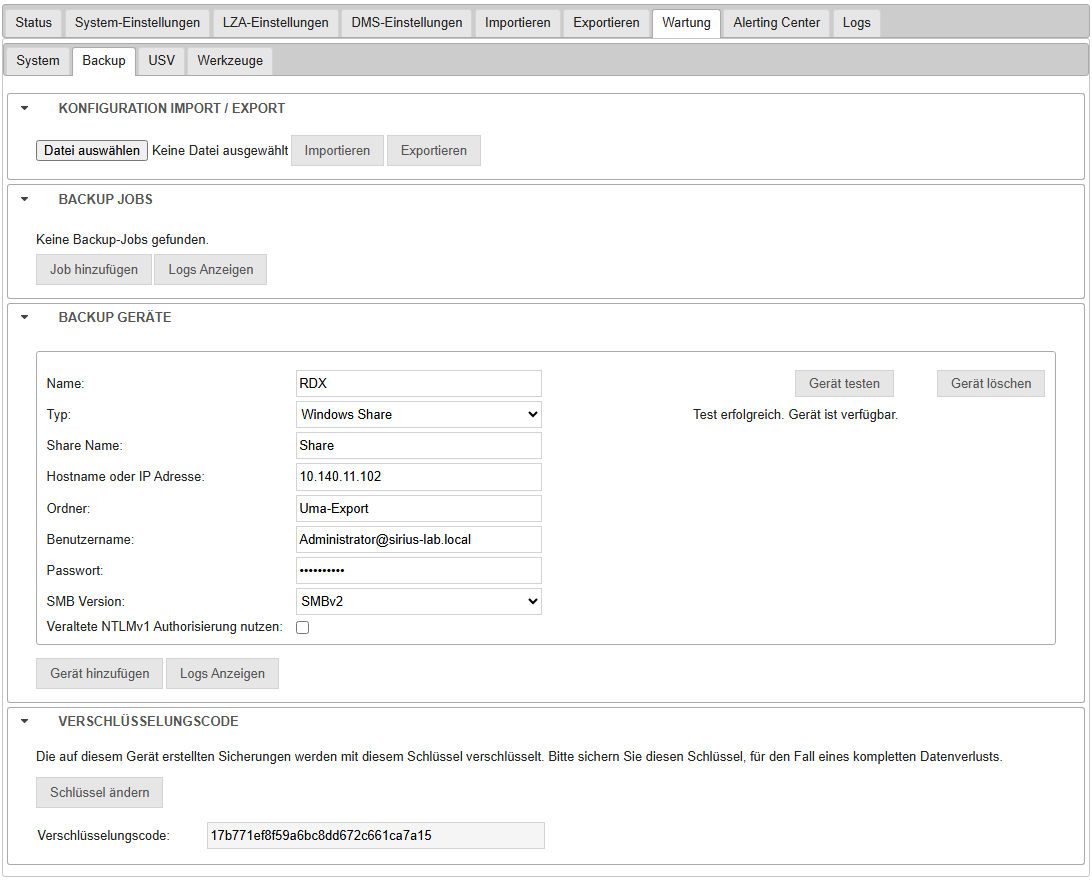
First, under Maintenance => Backup, an appropriate backup device must be added (in this example, as a Windows Share):
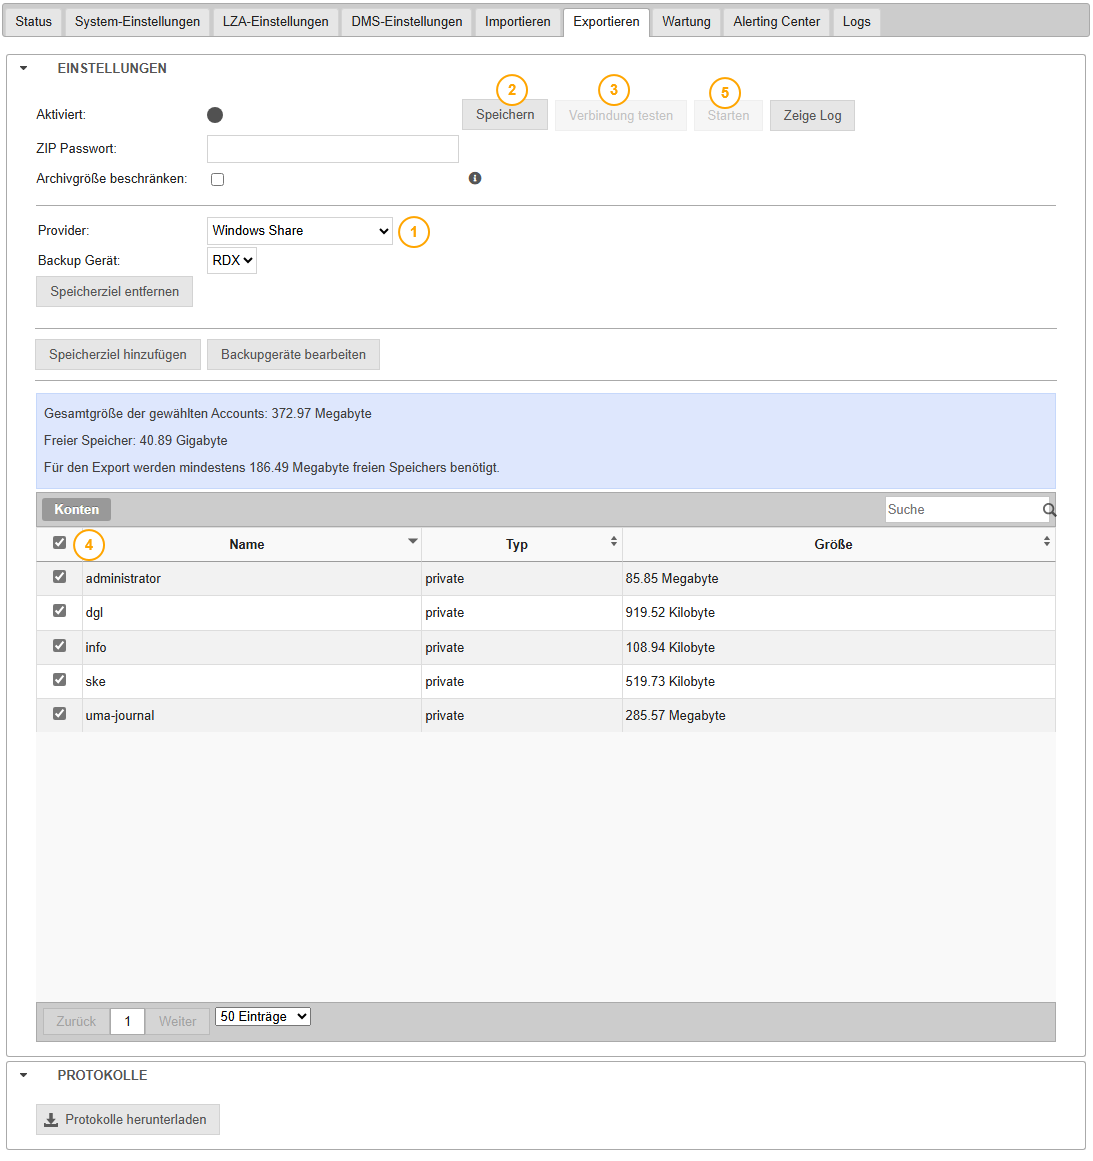
This can then be selected under Export in the Provider section (1).
Save (2) and test (3) the settings, select the desired accounts (4), and then start the export with Start (5)
Note
Please leave the password field empty
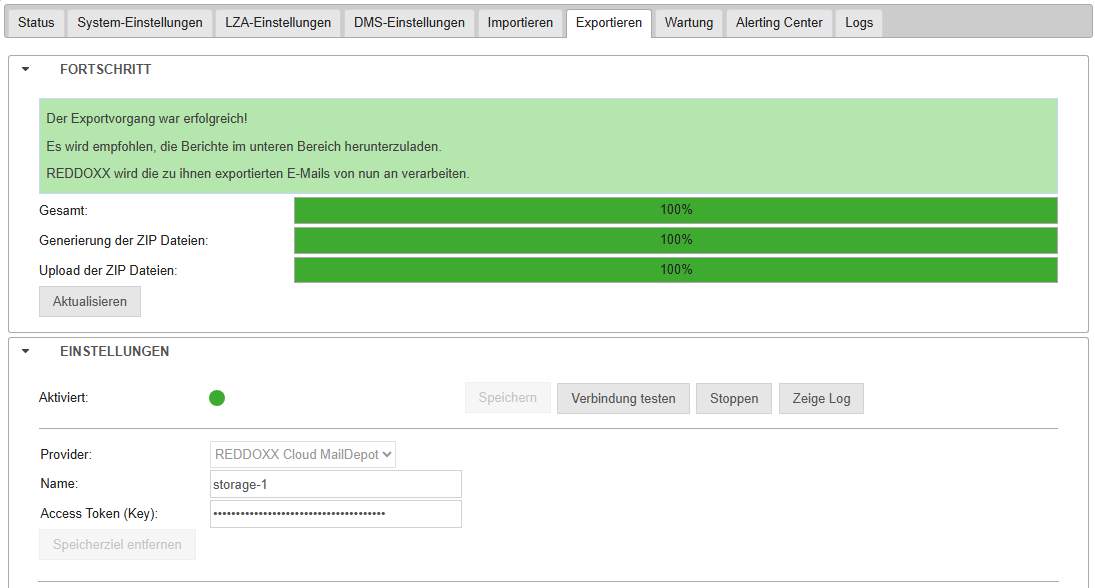
When the export is complete, this will be displayed accordingly in Securepoint UMA:

First, install the REDDOXX Toolbox on a system that is as performant as possible (a fast CPU is necessary for indexing, fast disk throughput for write/read operations, and sufficient RAM).
The previously exported ZIP files must then be copied to the system where the Toolbox is installed.
After copying, the system should ideally have as much free space again as the ZIP files combined (due to the deduplication performed during import, the migrated archive will certainly be significantly smaller).
Set up the Cloud Connect in the Toolbox:
- Click on Settings in the REDDOXX Toolbox
- Select REDDOXX Cloud
- In addition to the Base Address of the REDDOXX Cloud, you will need the Tenant ID and the API Key that you copied earlier.
Then perform the following steps in the Toolbox to import the ZIP:
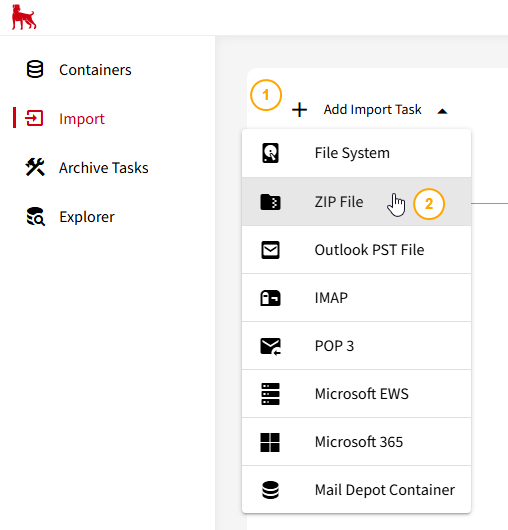
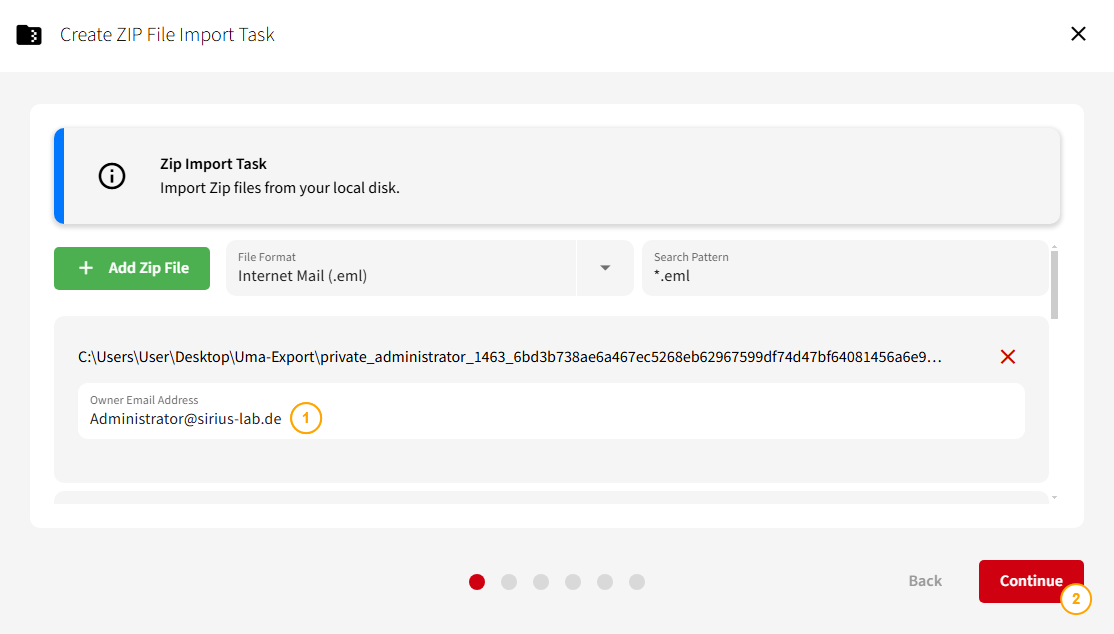
Switch to the Import section in the Toolbox and create a Zip File import:
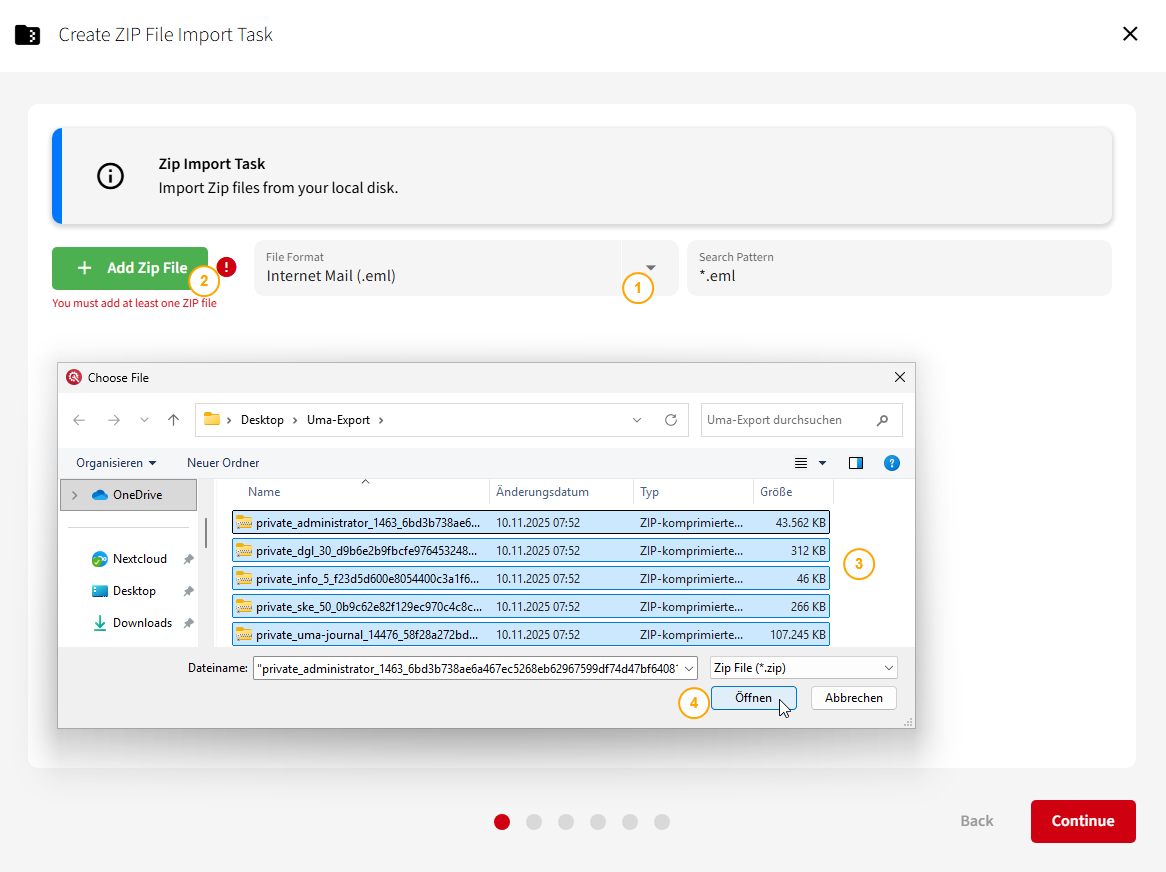
- Change the File Format to Internet Mail (.eml)
- Click on "Add Zip File"
- Select the UMA Zip Files (multiple selection is possible here)
- Click on "Open"
Then set the appropriate owner email addresses for the individual Zip Files, this is important for later search and assignment and confirm with Continue:
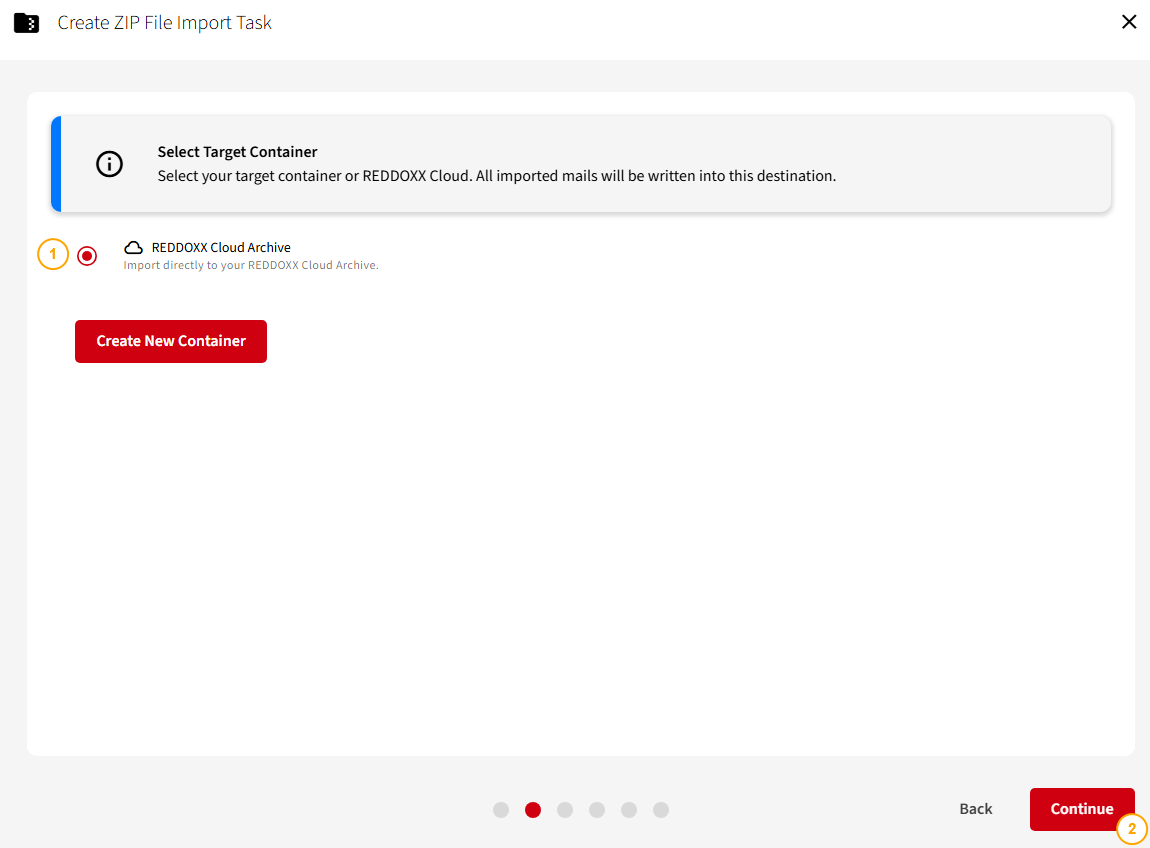
In the following field, select the Cloud Container:
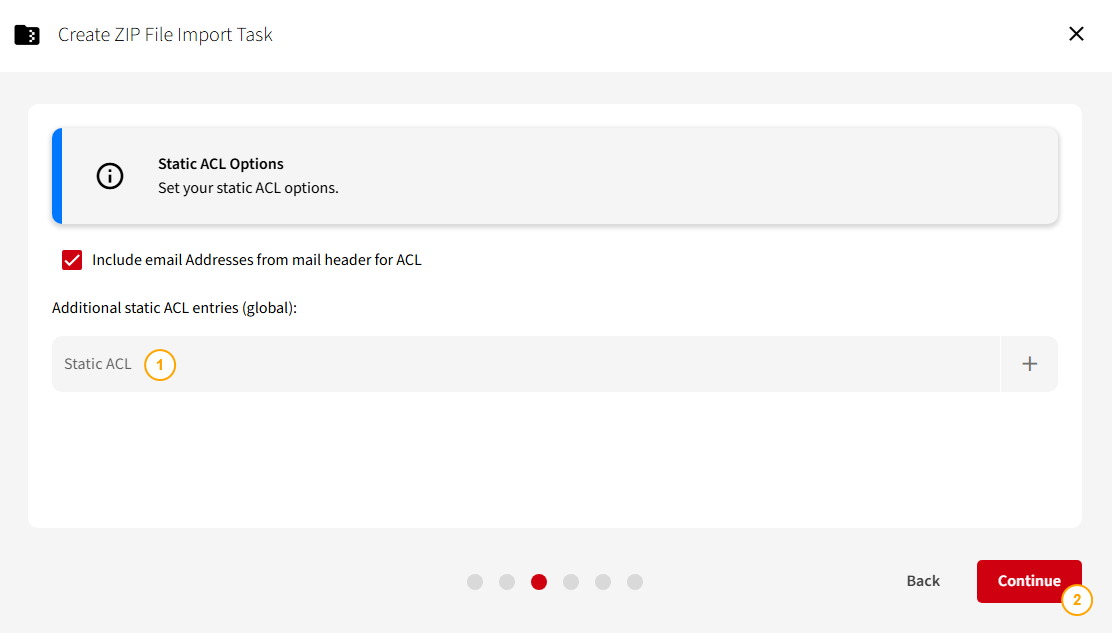
In the next step, you can set one or more additional email addresses.
If the container is ever used in a REDDOXX Appliance, users who log in to the archive with this address would be authorized to access all emails in the container:
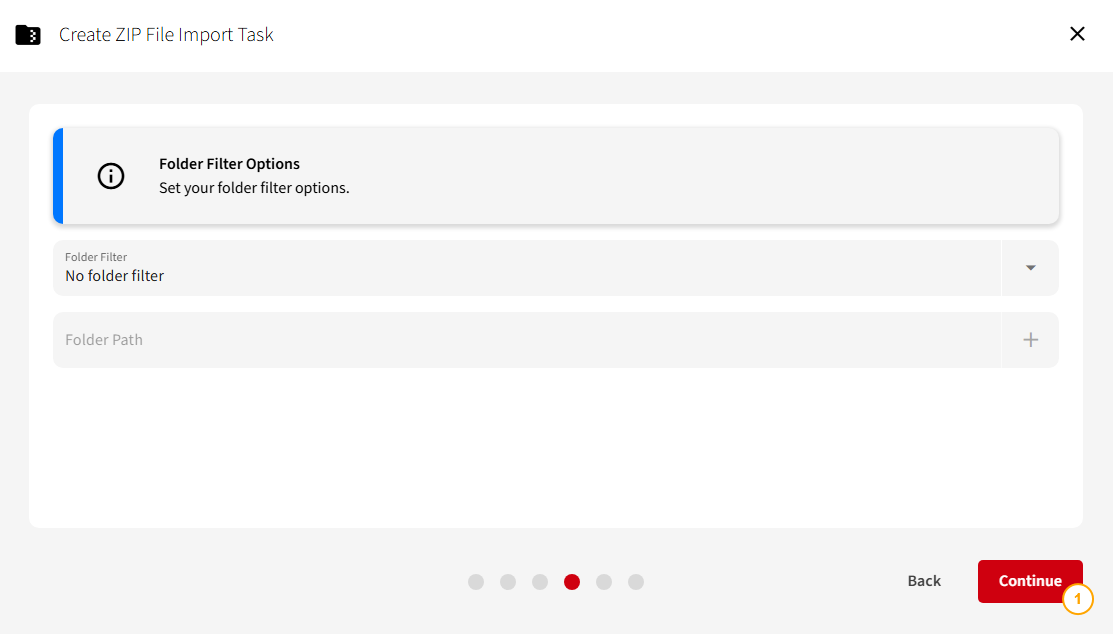
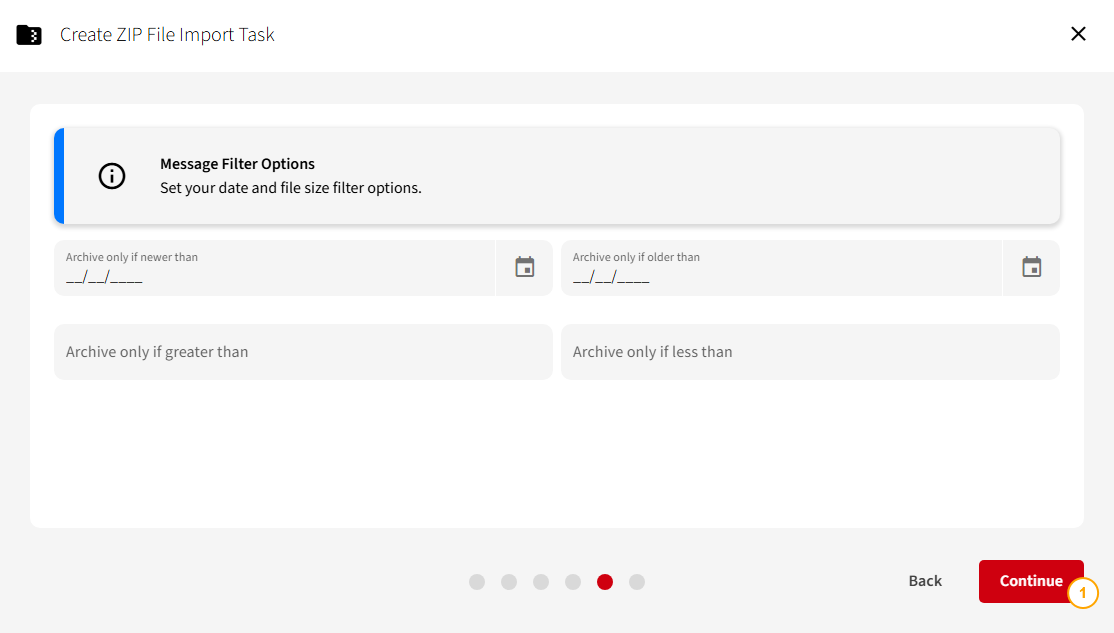
Click on Continue (since there are no folders in .eml files to filter on):
If the archive should only cover a specific period (e.g., the last 10 years), you can adjust the period in the Message Filter as desired:
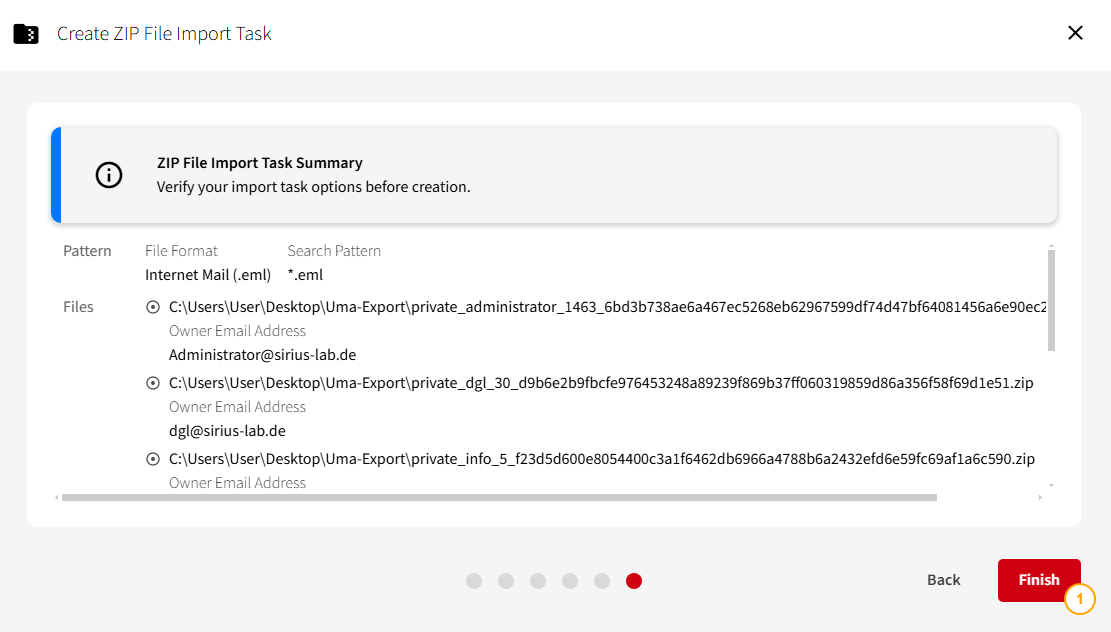
Finally, an overview of the task configuration is displayed:
In the task overview, you will now see the Zip Import Task, which you can start accordingly:

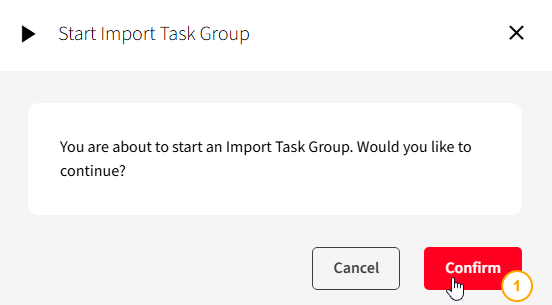
There will be an additional prompt asking whether all Zip imports belonging to this task should be started:
When the import is running, the list of individual objects can be expanded to view the individual progress:
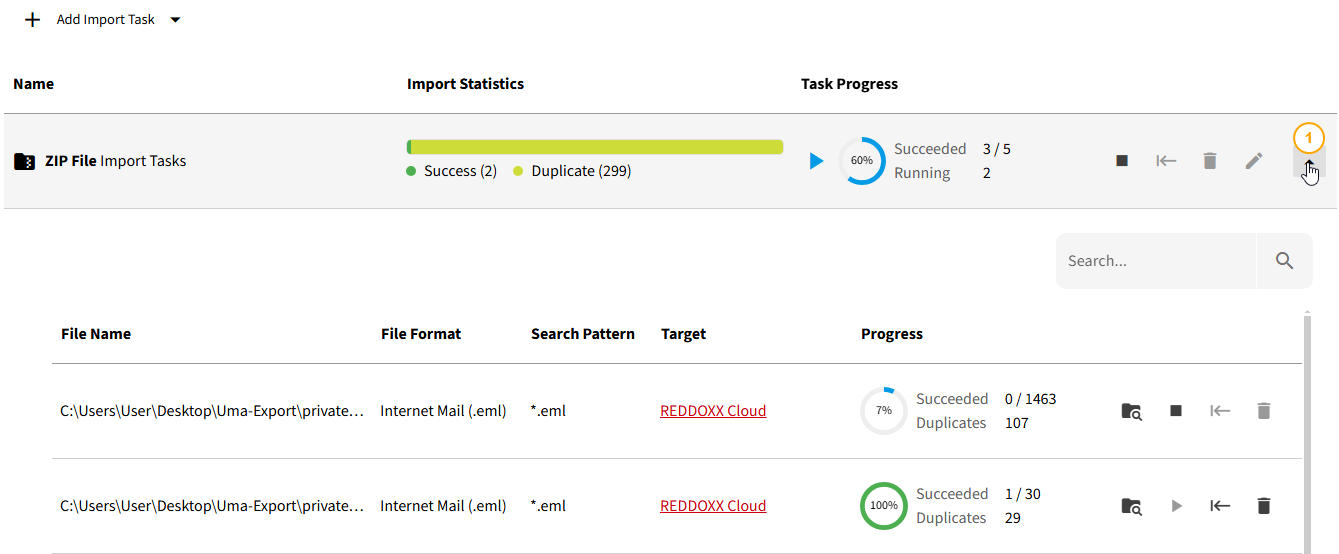
After completion of the import tasks, in case of errors, you can check via the Task Details icon whether and why certain elements could not be imported:

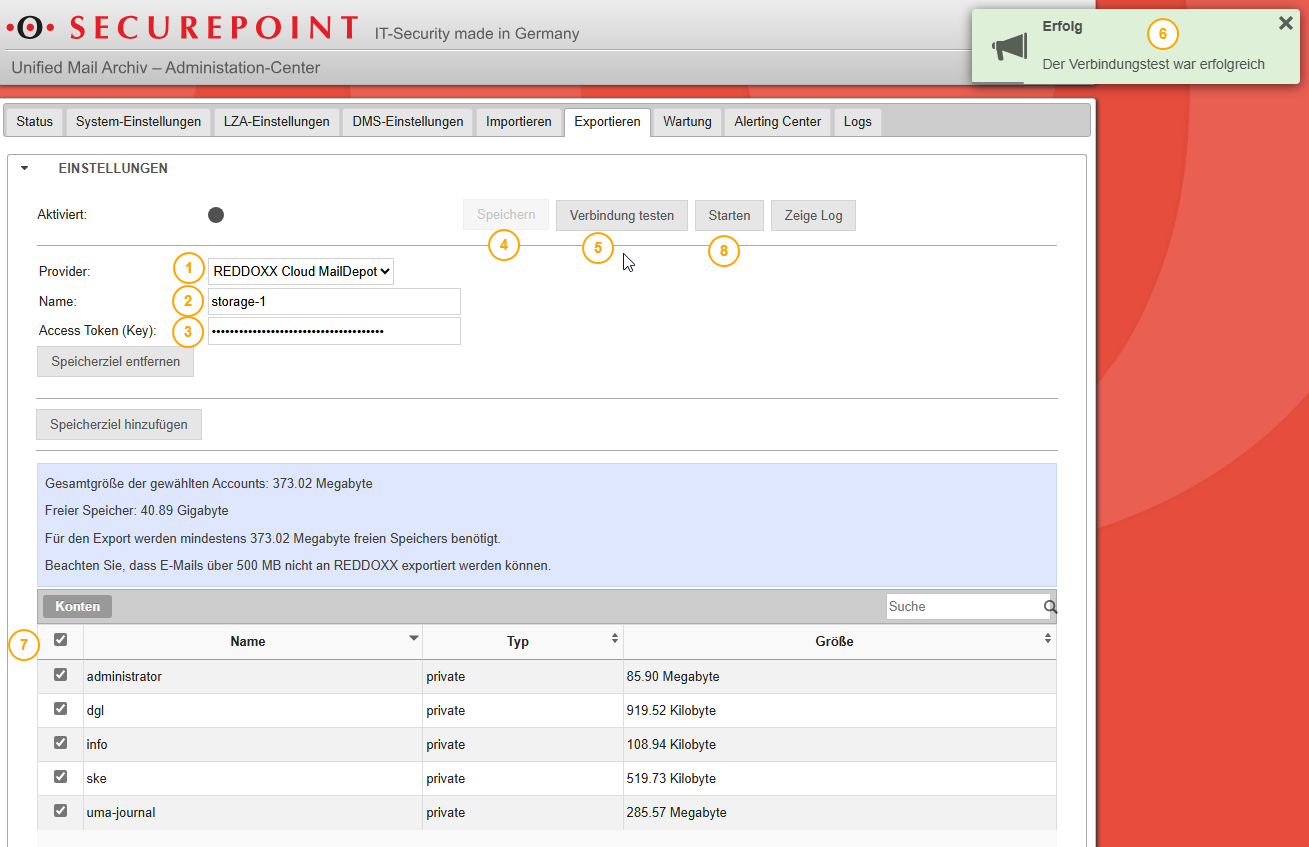
A direct export from Securepoint UMA is possible with the following steps:
- In the Export tab, click on Provider and select REDDOXX Cloud Maildepot
- Assign any name
- Enter the access token of the REDDOXX Cloud
- Confirm with Save
- Test the connection with Test Connection
- Wait for confirmation that the connection test was successful
- Select the accounts whose emails are to be archived in the REDDOXX Cloud
- Click on Start
When the export is complete, this will be displayed accordingly in Securepoint UMA:
