UMA => REDDOXX MailDepot
The following guide describes how to export the archive within Securepoint UMA, then install and import it into an archive container via the REDDOXX Toolbox, and finally transfer the archive container to REDDOXX MailDepot (as well as the basic installation of the latter). Links to detailed instructions are provided in the respective steps.
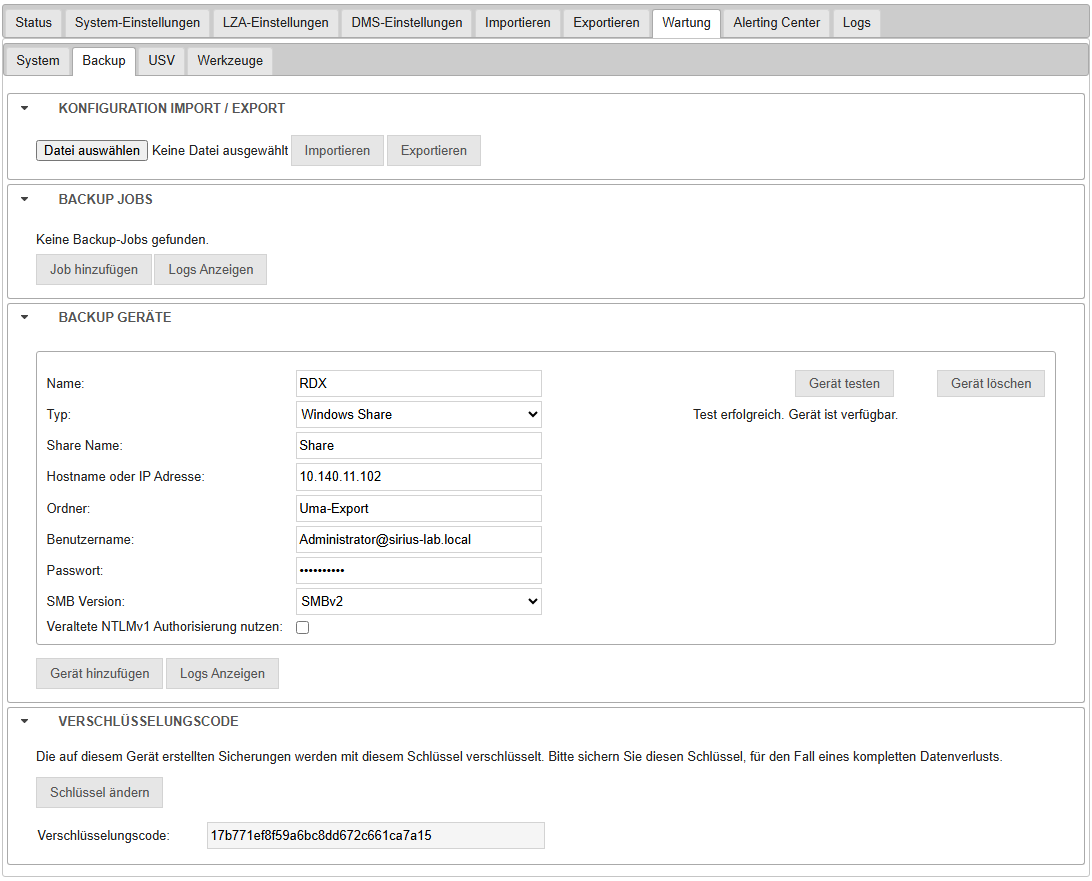
First, you need to add an appropriate backup device under Maintenance => Backup (in this example, a Windows Share):
Next, this can be selected under Export in the Provider section (1).
Then Save (2) and Test (3) the settings, select the desired accounts (4), and finally start the export by clicking Start (5)
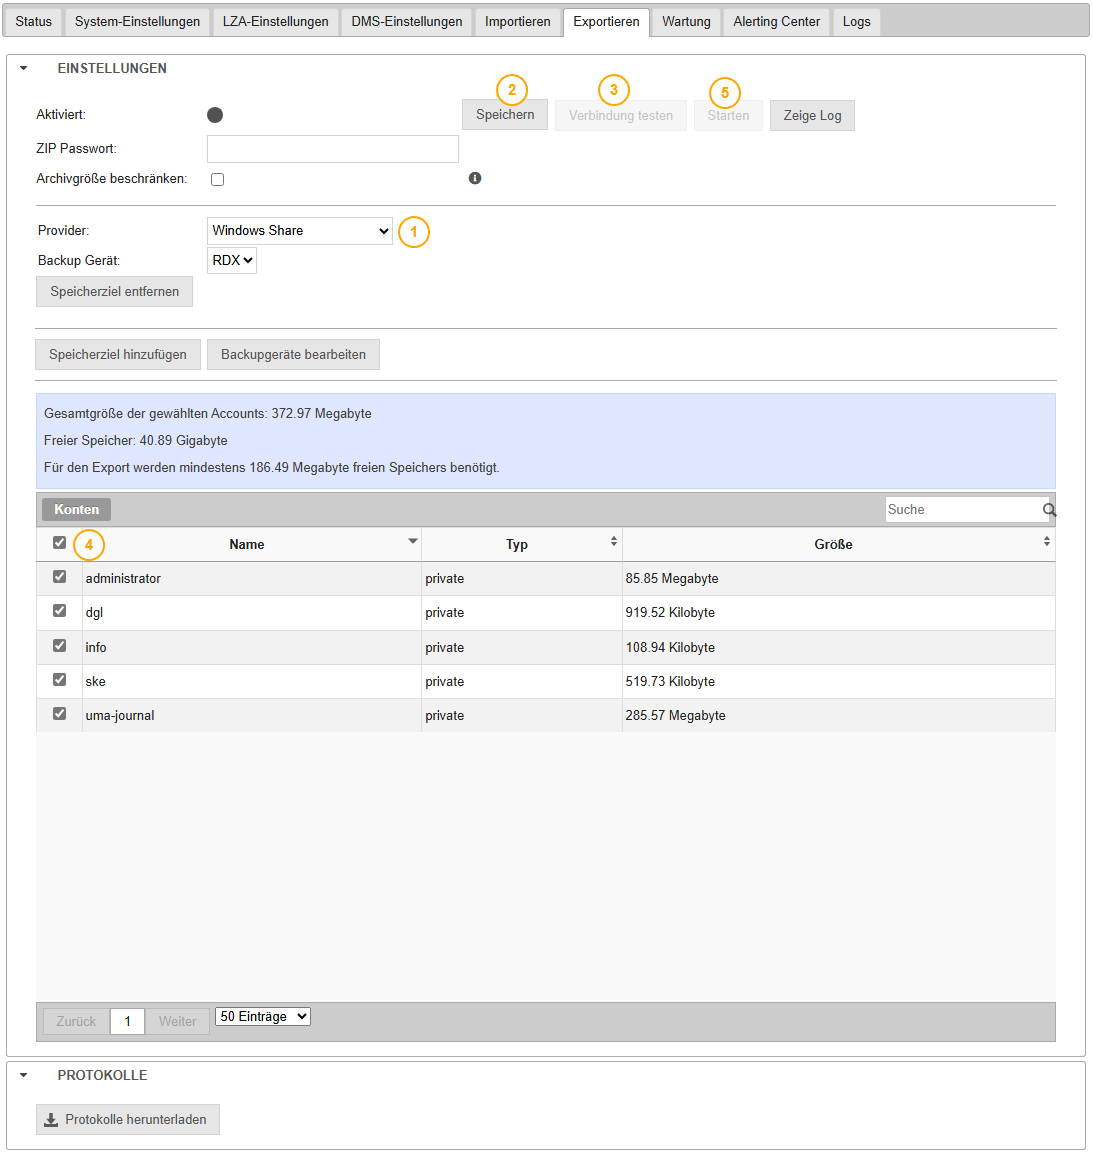
Please leave the password field empty
Once the export is complete, this will be indicated accordingly within Securepoint UMA.
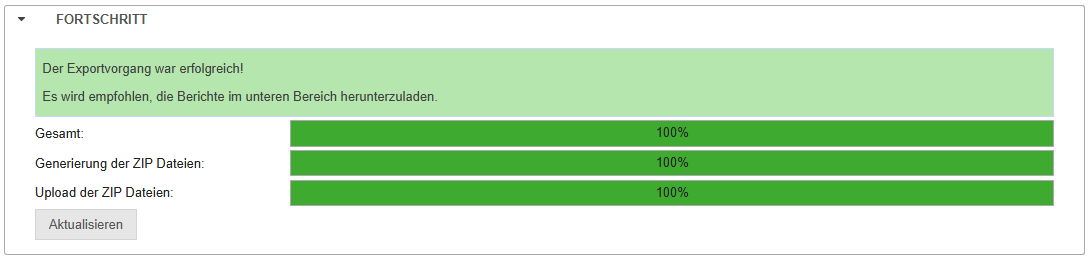
First, install the REDDOXX Toolbox on a high-performance system. A fast CPU is essential for indexing, rapid disk throughput is needed for read/write operations, and sufficient RAM is recommended
The previously exported ZIP files must then be copied to the system where the Toolbox is installed.
Ideally, after copying, the system should still have at least the same amount of free space as the total size of the ZIP files. Due to deduplication performed during the import process, the migrated archive will likely be significantly smaller
Next, follow these steps in the Toolbox to import the ZIP file:
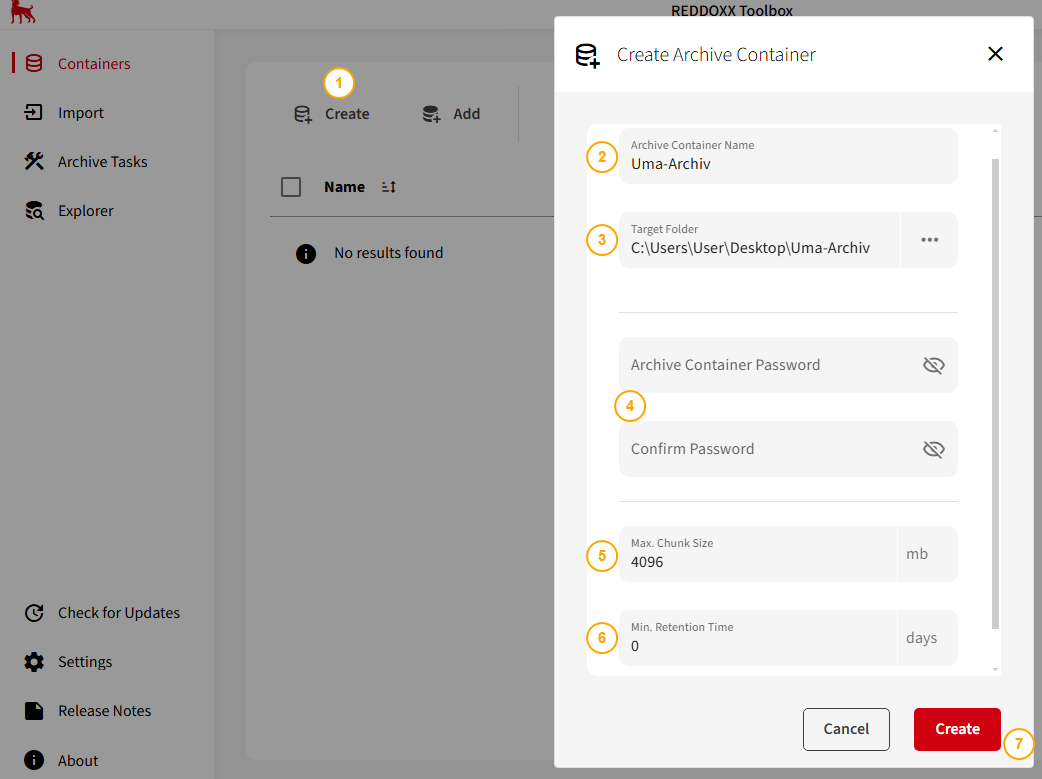
In the Toolbox, create a new local archive container by clicking Create (1), assign a name (2), and choose the storage path (3).
Optionally, you can set a password for the container (4), define the chunk size for container segments (5), and enable protection against accidental deletion (6).
Finally, confirm by clicking Create (7), and the container will be created and opened.
In the Toolbox, navigate to the Import section and create a new ZIP file import:
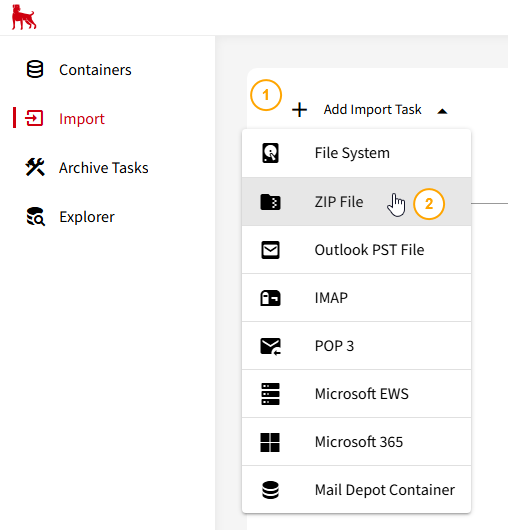
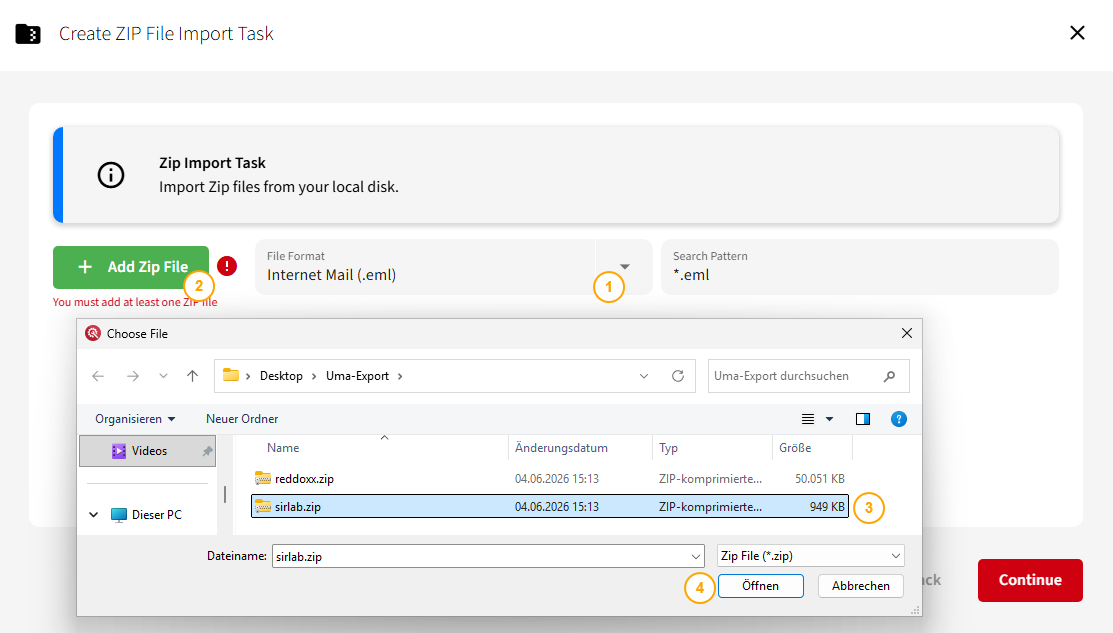
- Change the file format to Internet Mail Internet Mail (.eml)
- Click on "Add Zip File"
- Select the UMA ZIP files (multiple selection is supported, provided that these are zip files from a mailbox)
- Click "open"
Next, enter the relevant owner email addresses – this is important for future searches and allocation – and confirm by clicking Continue:
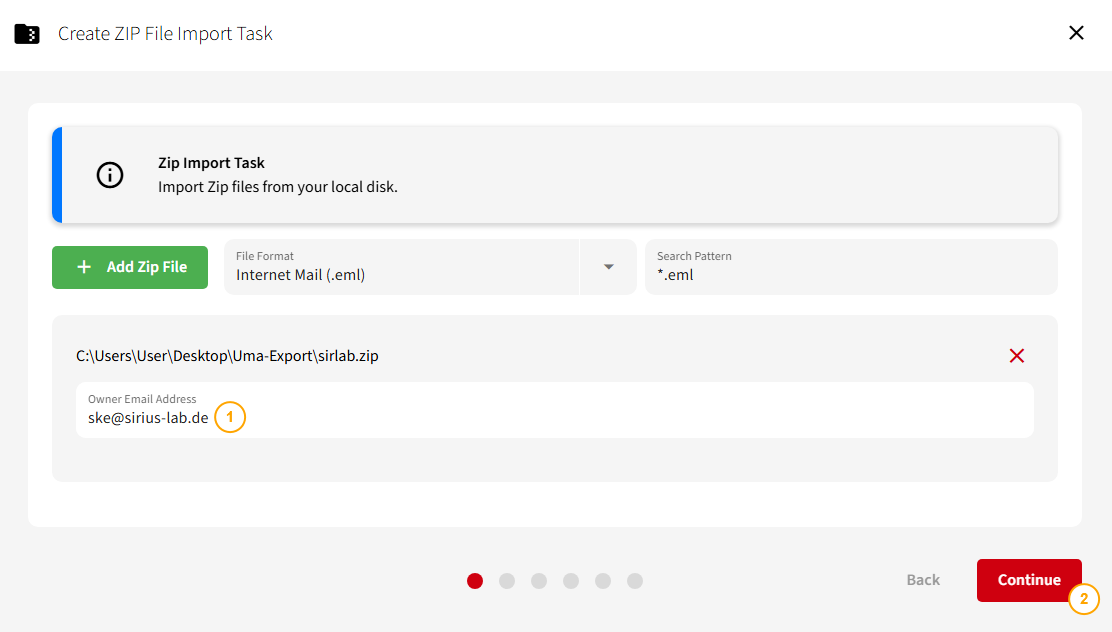
Please create only one task per owner
A task may therefore only have one owner, but any number of ZIP files (for that owner)
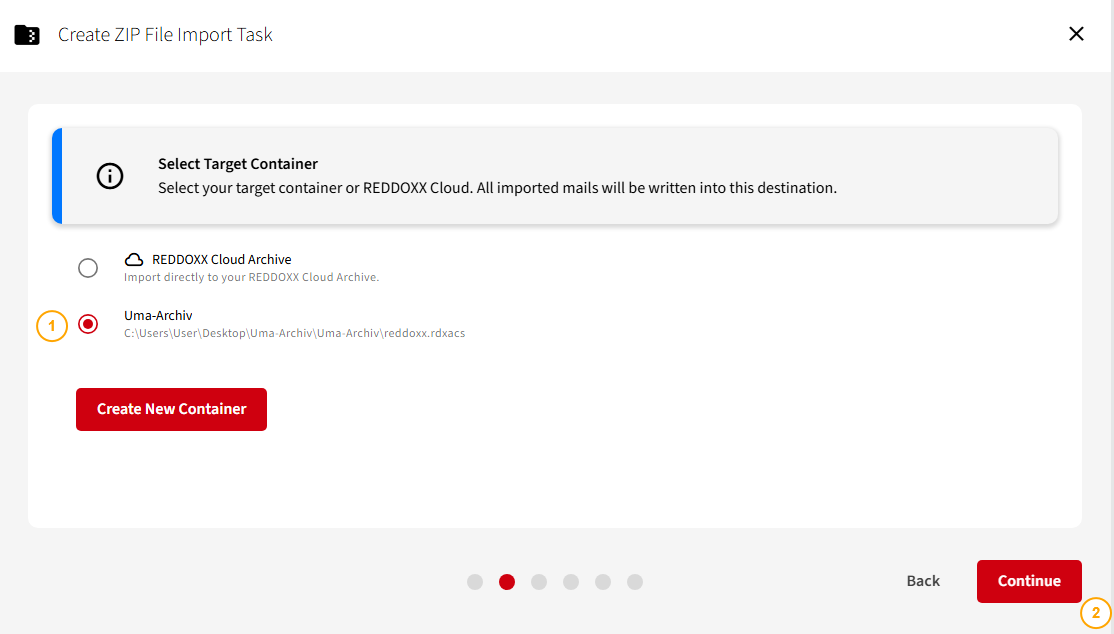
In the next field, select the container you previously created:
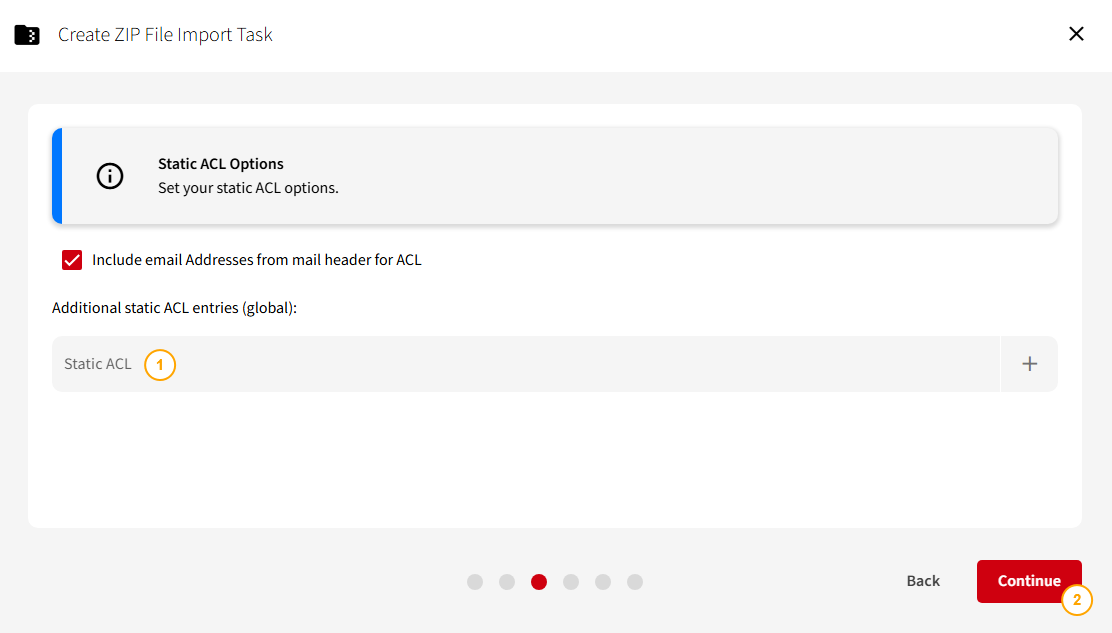
In the next step, you can assign one or more additional email addresses.
If the container is later used within a REDDOXX Appliance, users who log into the archive using these addresses will be granted access to all emails within the container:
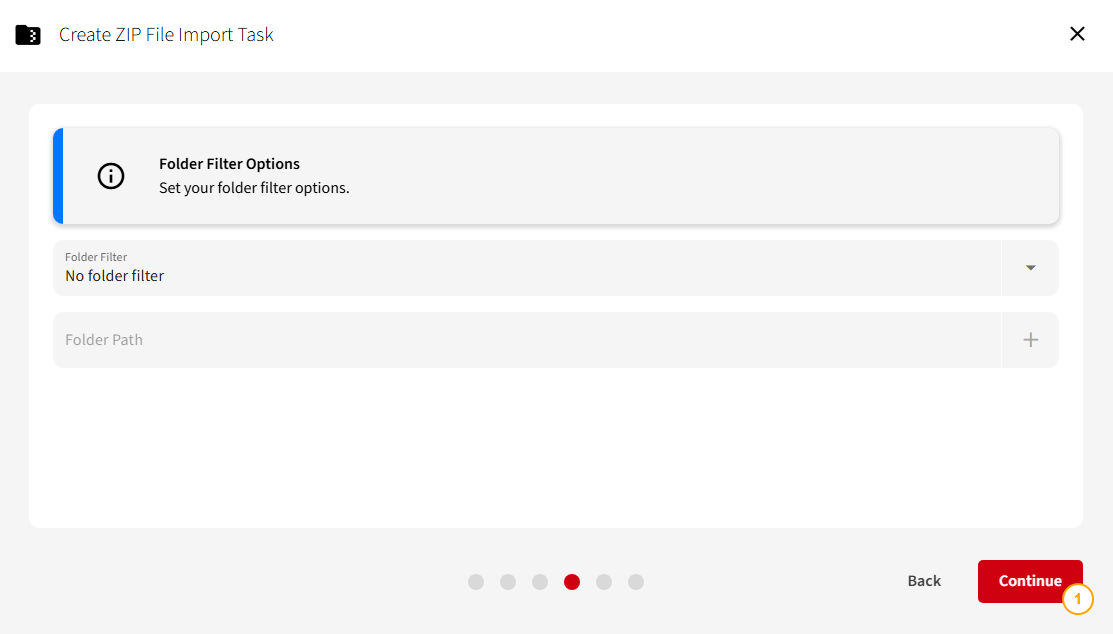
Click Continue (since .eml files do not contain folders that could be used for filtering):
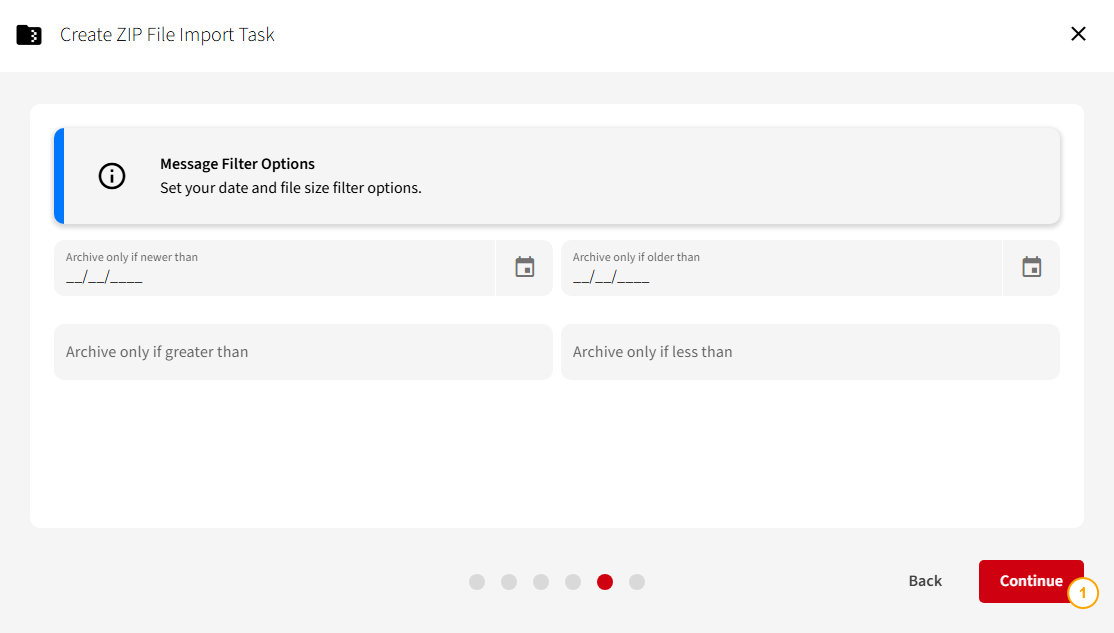
If the archive should only cover a specific time period (e.g., the last 10 years), you can adjust the desired range in the Message Filter settings accordingly:
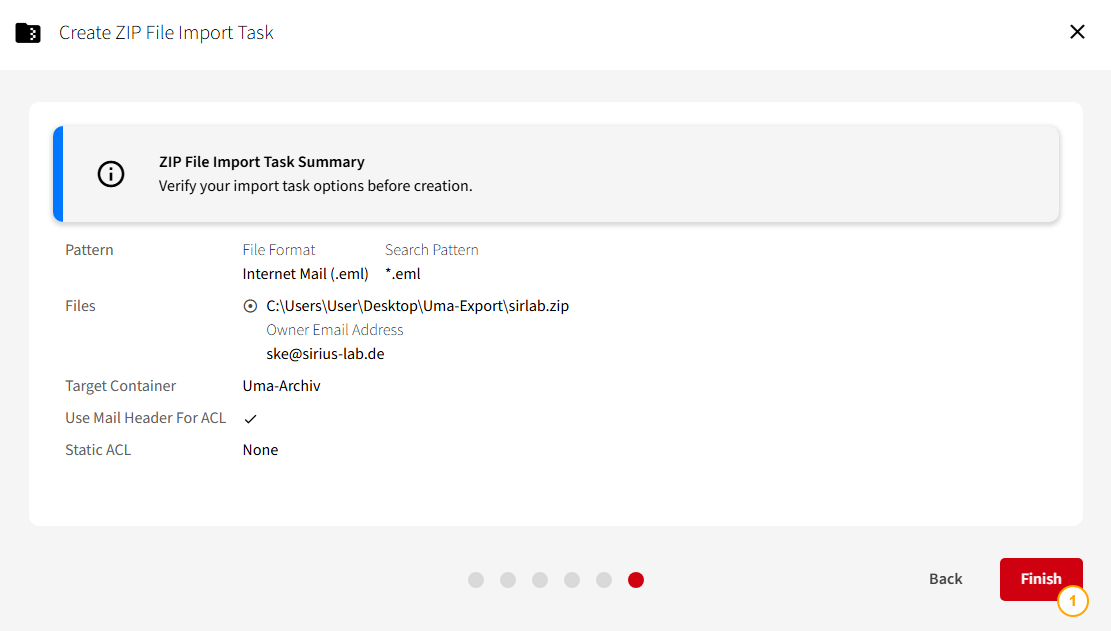
Finally, an overview of the task configuration is displayed once again:
In the task overview, you will now see the ZIP import task, which you can start accordingly:
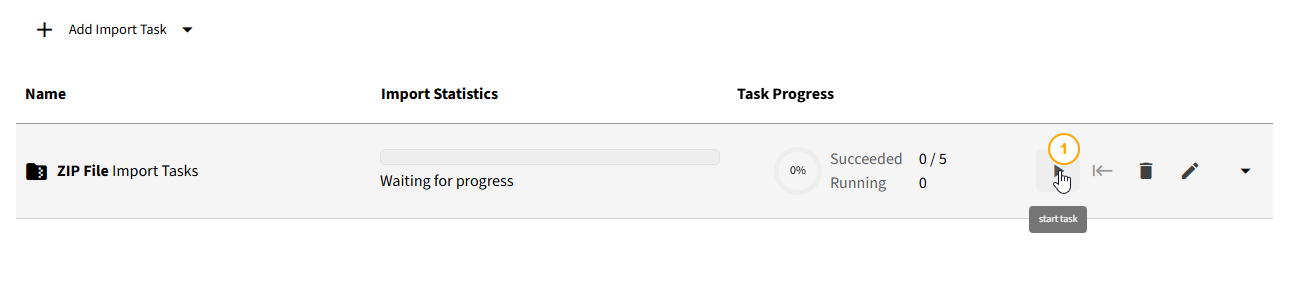
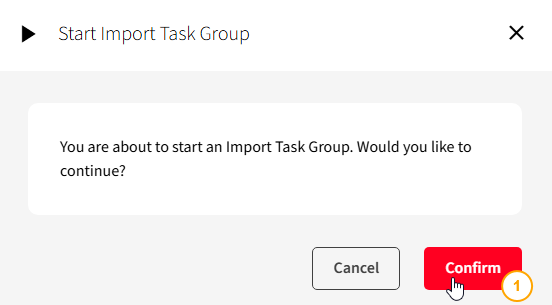
An additional prompt will appear asking whether all ZIP imports associated with this task should be started:
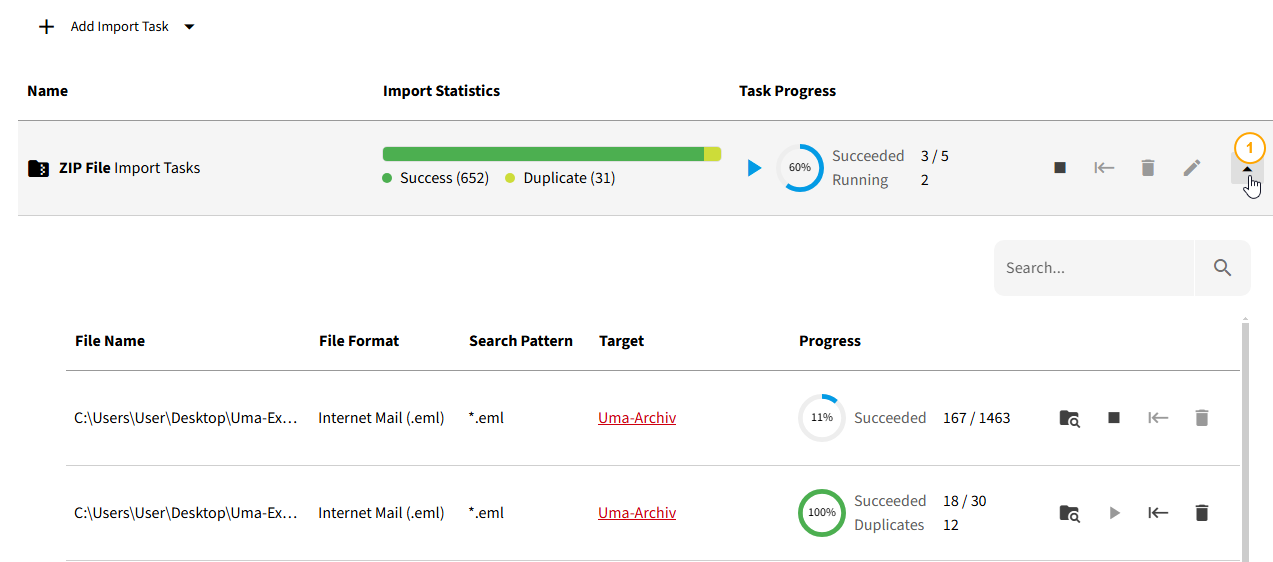
While the import is running, you can expand the list of individual items to view the progress of each one:
After the import tasks are completed, you can click the Task Details icon to review any errors. This allows you to check whether certain items were not imported and understand the reasons why:

You can now use the Toolbox search to access and explore the archive.
Switch to the Explorer view, where you can perform a standard search by entering keywords. (This search is fuzzy by default, meaning it also finds similar terms).
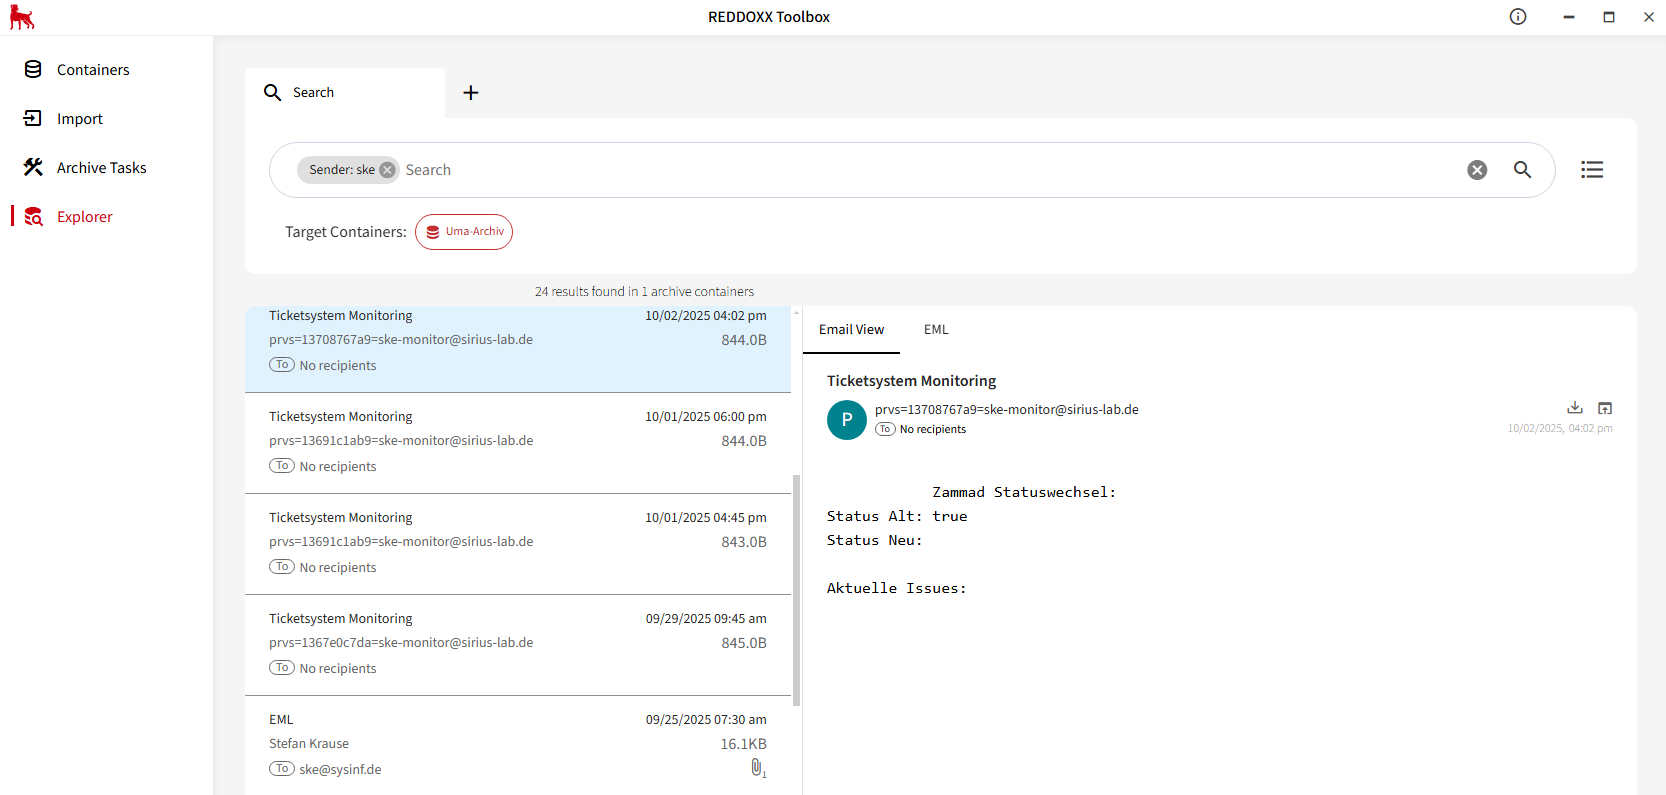
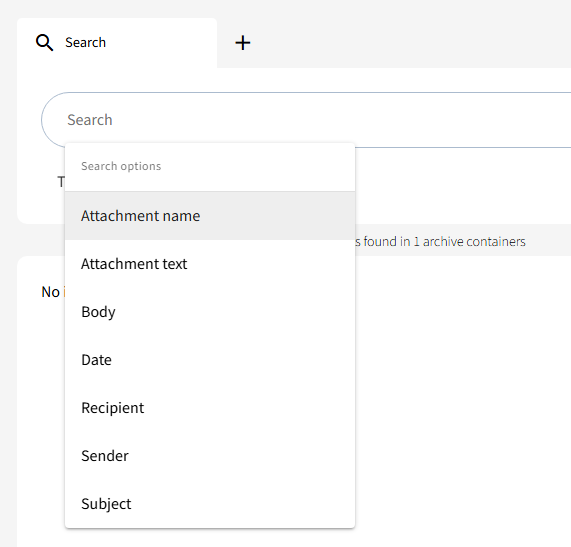
You can also select a specific search field before starting your query:
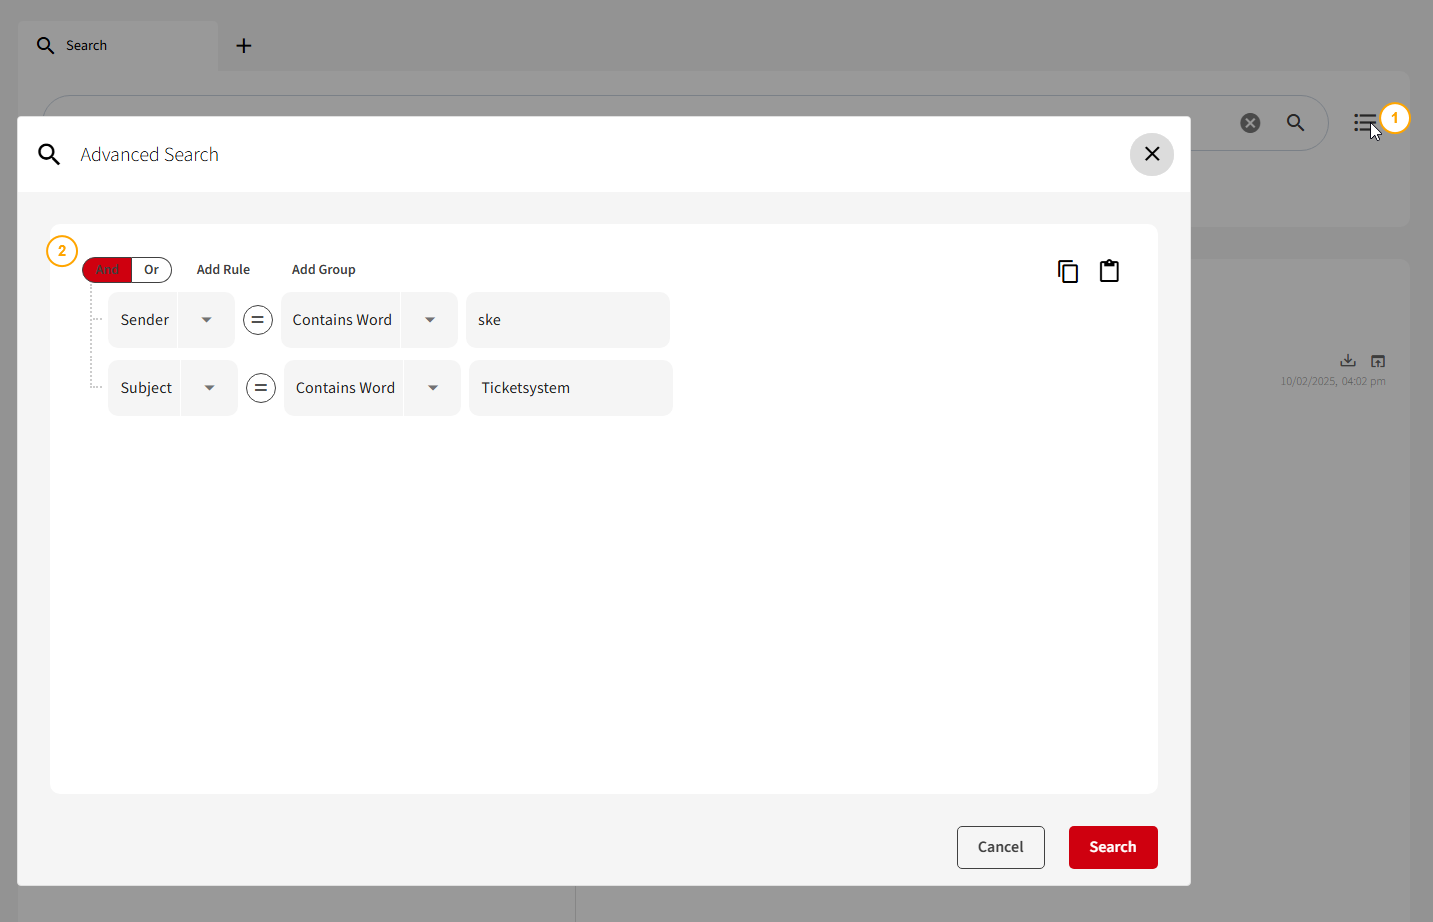
For more advanced queries, use the Advanced Search (1), where you can define detailed criteria and combine them logically (2):
To do this, install the current ISO on a supported environment.
After installation, you need an EVAL license to register the appliance (create an account on my.reddoxx.com and use the Link to request an EVAL license):
A detailed installation video can be found here:
https://appliance-2034-admin.docs.reddoxx.com/en/installation/installationsteps
After installing the REDDOXX Appliance, only a few steps are necessary to access the email archive.
- Set up a storage under Configuration => Storages by adding one (we recommend Local Disc, i.e., an additional virtual hard disk in the case of virtual machines):
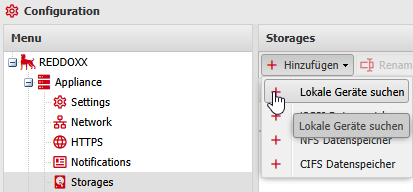
In the case of a Local Disc, this storage must then be formatted via right-click => Advanced.
Other storage types as well as their setup and use are described here:
https://appliance-2034-admin.docs.reddoxx.com/en/configuration/storages
-
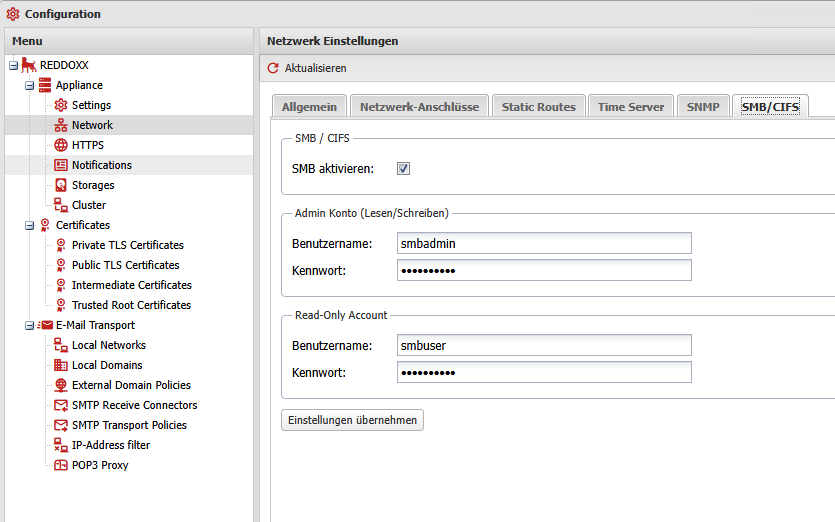
Set up a share via Configuration => Network => SMB / CIFS so that the added storage is accessible on the network
-
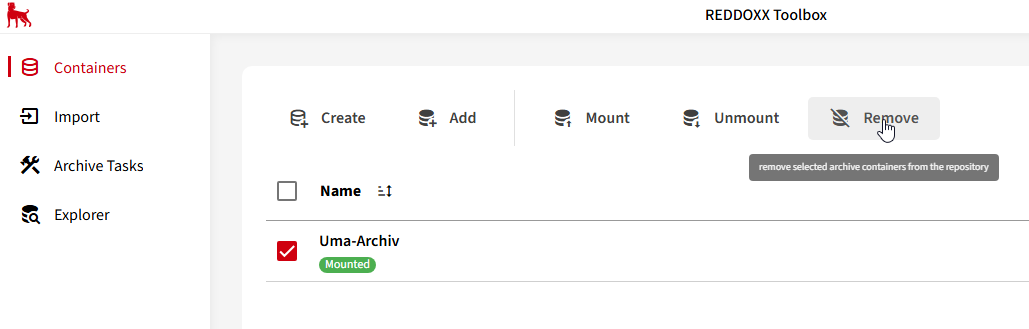
Close and remove the container from the Toolbox to prevent duplicate accesses from blocking the process:
-
Copy the container via the created share to the REDDOXX Appliance.
-
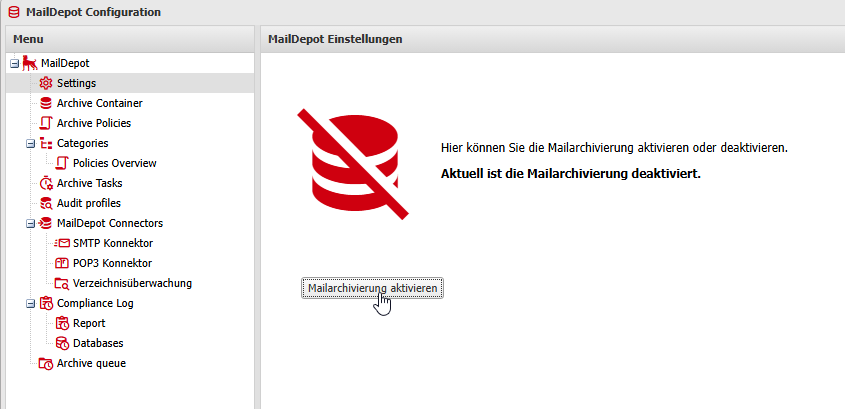
In the appliance, go to Maildepot => Settings and activate the MailDepot archiving:
-
In MailDepot => Archive Container, you can now open the copied container via "Add" (select the path of the container and open the container via the reddoxx.rdxacs file).
-
For users to also access via the user interface, user accounts are now required.
The easiest and fastest way is to use AD synchronization using a Realm.
Realms are created under Administration => User and Groups => Realms via add.
This is described in detail in the Admin Manual and depends on whether and which directory services are available to you. -
As soon as the login Realm, respectively the users and their email addresses, are present in the appliance, users can log in, for example, via the web interface (https://ApplianceIP/user) and search for emails that correspond to their associated email aliases (note that initially, for performance reasons, only the last few days of archived emails are displayed, but a search then runs across the entire archive).
-
Now the appliance can also be used for permanent archiving of new emails; for this, operation in the mailflow would be suitable on the one hand (in which the REDDOXX Appliance automatically archives emails transported through it) or alternatively the use of a journaling rule (provided the currently used email server supports this).
The entire documentation can be found at:
https://appliance-2034-admin.docs.reddoxx.com/
There, the individual modules (Spamfinder / MailSealer / MailDepot), Quick Guides, Release Notes and Quick Guides for the initial setup are listed.